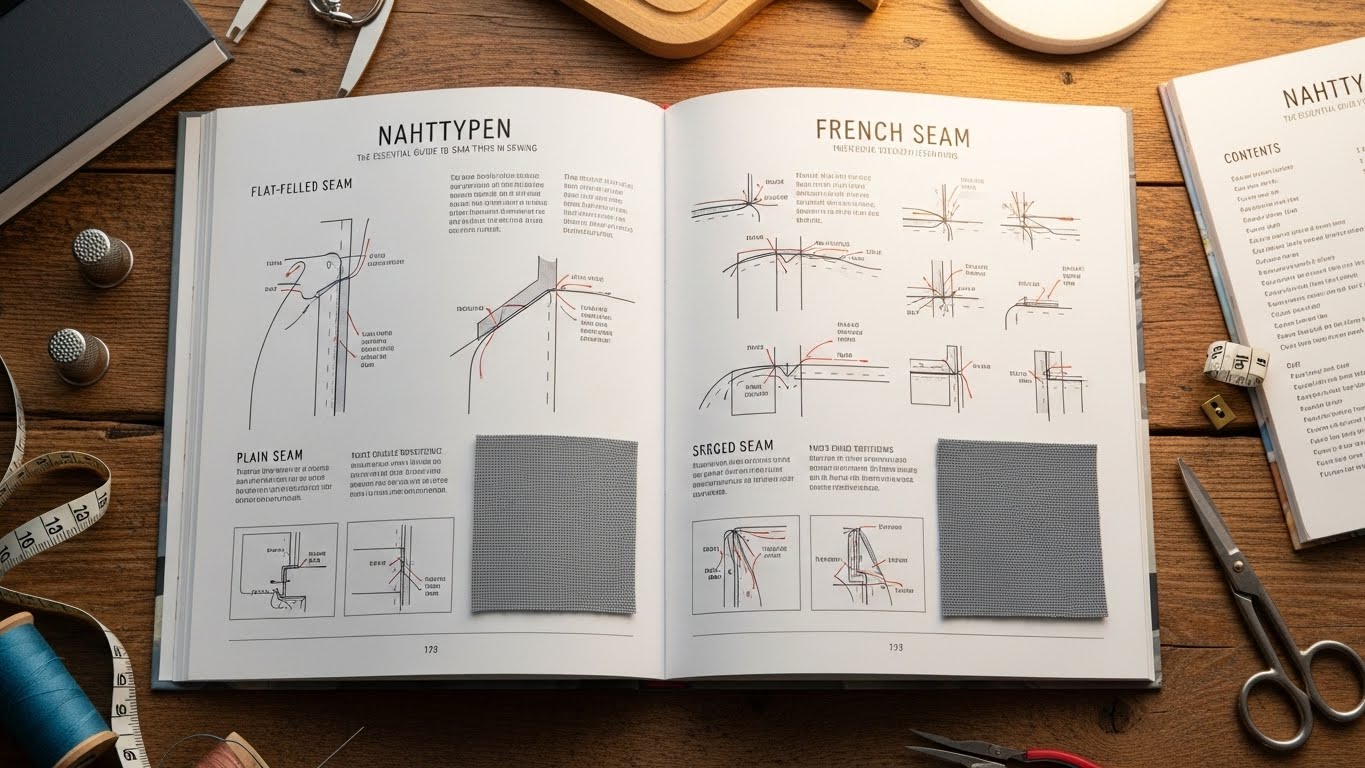
Sewing is an art that blends creativity with technique. At the heart of this craft lies a fundamental aspect often overlooked: seam types, or as we say in German, Nahttypen. Each type serves its purpose and enhances your project’s durability and aesthetics. Whether you’re stitching together a simple pillowcase or crafting a tailored garment, understanding these seams can make all the difference.
In this guide, we’ll unravel the world of Nahttypen, exploring both basic and advanced techniques to elevate your sewing skills. From choosing the right seam for specific fabrics to tips for achieving that professional finish, you’re just about to embark on a journey into the fascinating realm of seams! Ready? Let’s dive in!
Basic Seam Types for Beginners
For those just starting in sewing, understanding basic seam types is essential. These seams form the foundation of your projects and help you achieve a polished look.
The straight stitch is one of the simplest and most commonly used seams. It’s perfect for joining two pieces of fabric together, making it ideal for beginners.


Another popular option is the zigzag stitch. This seam allows for some stretch, which is excellent when working with knit fabrics or when you want to prevent fraying on raw edges.
If you’re looking to add a little flair, consider using a French seam. It encloses raw edges neatly, offering a clean finish that’s perfect for lightweight fabrics.
Don’t overlook the topstitched seam either; it adds decorative detail while securing layers together effectively. As you experiment with these basic types, you’ll build confidence and skill in your sewing journey.
Advanced Seam Types for Experienced Sewers
Advanced seam types elevate your sewing projects, adding both durability and style. One popular choice is the flat-felled seam. This technique hides raw edges and creates a sturdy finish, making it ideal for denim or shirts that endure wear.
Another innovative option is the French seam. Perfect for lightweight fabrics, this method encloses raw edges within the seam itself. The result? A clean look that’s also soft against the skin.
For those looking to add flair, consider using a lapped seam. This technique allows you to play with contrasting fabrics or colors while maintaining strength in stress areas.
Explore bias-bound seams if you want to highlight fabric edges creatively. They offer an artistic touch while preventing fraying—a perfect mix of function and form! Experimenting with these advanced techniques can transform your sewing experience into something truly special.
Choosing the Right Seam Type for Your Project
Selecting the right seam type for your project can make all the difference. Consider the fabric you’re using; lighter materials may benefit from a French seam, while heavier fabrics often require flat-felled seams for durability.
Think about how much stress the area will endure. For items like bags or jeans, opt for reinforced seams to ensure longevity. A simple straight stitch might suffice for less demanding applications.
Also, consider aesthetics. Some seams are designed to be visible and can add visual interest—like decorative topstitching on garments.
Don’t forget ease of construction! If you’re in a rush or just starting out, simpler seam types can save time and reduce frustration as you build confidence in your sewing skills. Knowing your project’s requirements will guide you toward making an informed choice that aligns with both function and style.
Tips and Tricks for Neat and Professional Seams
Achieving neat and professional seams is an art that can elevate your sewing projects. Start by using a quality fabric and thread. The right combination reduces fraying and improves stitch integrity.
Press your seams as you go. A hot iron can work wonders, flattening out any bumps or puckers. Always press from the wrong side to avoid shiny marks on the front.
Use a seam guide while stitching. This helps maintain consistent seam allowances, which is crucial for a polished appearance.
Invest in good scissors or rotary cutters for clean edges. Dull tools lead to jagged cuts, affecting the final look of your garment.
Don’t forget about finishing techniques like zigzag stitches or pinking shears to prevent fraying. These small steps make a significant difference in durability and aesthetics.
Practice makes perfect! Experiment with different fabrics and techniques until you find what works best for you.
Alternatives to Traditional Seams
When it comes to sewing, traditional seams aren’t the only option available. Exploring alternatives can lead to innovative results and unique finishes.
One popular alternative is using bias tape. This method not only adds a decorative touch but also enhances durability. It’s great for edges that need extra support or a polished look.
Another exciting choice is the flat-felled seam. Often seen in denim, this technique encloses raw edges inside two layers of fabric, providing strength and a clean finish.
For those who prefer an even simpler approach, consider using adhesive strips or fusible webbing. These methods allow you to bond fabrics together without needlework—perfect for quick projects or delicate materials.
Explore overlocking stitches with sergers. They create beautifully finished edges while preventing fraying, making them ideal for knit fabrics and activewear garments.
Conclusion
Understanding Nahttypen is essential for anyone looking to improve their sewing skills. By mastering both basic and advanced seam types, you can elevate your projects from simple to professional. Selecting the right seam type ensures that your garments not only fit well but also stand the test of time.
As you experiment with different seams, remember that practice makes perfect. Neat and professional seams come from attention to detail and a bit of patience. Don’t hesitate to explore alternatives too; they may offer creative solutions for unique projects.
Embrace the journey of learning about Nahttypen, as each stitch adds character to your creations. Happy sewing!


